
I’ll be honest, my goal to pull off the classic Kiwi dessert actually started out in my head as – dramatic pause – *** The Perfect Pavlova Mission ***
 Of course, Perfect Pavlova makes a far better headline than Adequate Pavlova (I have an unfortunate penchant for alliteration.) But after coming to the realisation recently that striving for perfection is a complete waste of time, have been making a conscious effort to put this mantra into practice.
Perfectionism and my tendency to over-complicate things is not only a big time waster, it’s causing me unnecessary stress, eroding my self-esteem, my sense of humor and basically doing my head in, one tiny failure at a time.
Failure is a harsh word. Like loser. No one strives to lose. We go out of our way to avoid failure. Because it hurts.
And these perceived failures and shortcomings are of no consequence in the grand scheme of things.
In striving for perfectionism, I’m actually setting myself up to fail.
So those chocolate pastries I baked didn’t live up to my oh-so-high expectations – oh well, I’m no pastry chef, live and learn and do it better next time.
My hair is fly away and frizzy – But my friends and family still love me in spite of it and my dog Bonnie certainly doesn’t care.
Here’s a biggie: Sometimes I make spelling mistakes/grammatical errors at work. (These are the WORST feels.)
Amend it. Figure out why I missed it. Revise my editing methods. Move on.
Life is full of delicious failures, quirky flaws, laughable mistakes and awkward squirm-fests. But if you really think about it, our fallibility is what makes us so delightfully human. The key is perspective.
Back to the Pavlova. The origin and technique for mastering this classic Kiwi (or Australian, depending on where you’re from) dessert is shrouded in mystery.
Regardless of where it comes from, I think we can all agree that scoffing huge drifts of this melt-in-your-mouth, sweet, soft and chewy dessert is an actual birth right for all Kiwis. Also, its fluffy lightness won’t weigh you down: hence it’s the perfect dessert for summer and after big meals. There’s always room for pav.
I’ve attempted this elusive holy grail of Kiwi cookery several times over the past five years with dismal results ranging from delicious fiascos to inedible. So, before we get started, here’s a few things I’ve learned along the way:
 Follow the directions, and use the exact ingredients and equipment listed. (The egg whites and sugar will not reach their essential pillowy, tacky, glossy state if you use a blender or a food processor. Trust me.)
- As in most recipes, eggs should be room temperature and fresh as possible.
- Pour the sugar into the egg whites S-L-O-W-L-Y. If you dump it all in at once, it won’t work.

I used the recipe from my good old Edmonds Cook Book:
- 4 egg whites
- 1 1/2 cups caster sugar
- 1 tsp white vinegar
- 1 tsp vanilla essence
- 1 tbs cornflour

imperfect circle dammit!
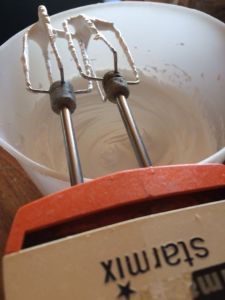
Preheat oven to 180C. Using an electric mixer, beat egg whites and add caster sugar one tbs at a time for 10-15 minutes, or until thick and glossy.
Mix vinegar, essence and cornflour together. Add to meringue. Beat the shit out of it for another 5 minutes.
Line an oven tray with baking paper and draw a 22cm diameter circle on the paper.  Spread the pavlova to within 2cm of the circle, keeping it as round and even and smooth as possible.
Place pav in the preheated oven and turn temperature down to 100C. Bake for one hour, turn off the oven, open oven door slightly and leave pavlova to cool.
While it’s doing its thing, you can work on the topping.
The recipe called for fresh berries and mint to slather all over the pav, but we all know we can decorate them with whatever’s on hand, such as Laura Vincent’s Smartie Pavlova from her blog Hungry and Frozen, or Jamie Oliver’s Meringue with Pears, Cream, Toasted Hazelnuts and Chocolate Sauce.
Berries are in season at the moment, but I wanted to use the fresh apricots I’d picked up from the road side stall in Rapaura at the weekend.
So I went with a luscious citrus cream, tangy poached apricots and ginger syrup:
- six fresh apricots, halved and stones removed
- One inch piece of ginger, shaved
- 1 cup of water
- 1/2 cup of caster sugar
- 330ml pouring cream
- 2-3 tbs lemon curd
- mint leaves
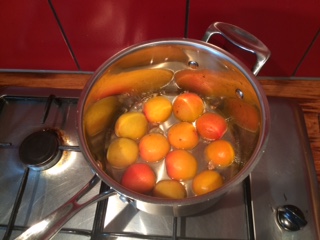 Bring water, sugar and ginger to boil and simmer for 2 minutes. Add apricots and simmer for 8-10 minutes (depending on how ripe they are).
Remove the apricots, reserving the ginger syrup. 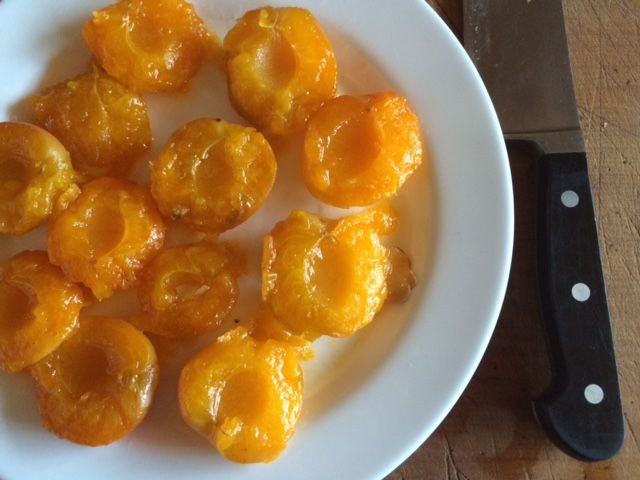 Once they are cool, slice each half into 3 or 4 crescents.
For the citrus cream: Beat the cream, adding 2-3 tbs lemon curd (or to taste) when it’s almost fully whipped.
 Once the pavlova has cooled, now’s your chance to disguise any imperfections or mishaps you may have had (such as inadvertently pulling the entire outer layer off while trying to transfer it from the baking tray to a plate.) by artfully decorating it with your chosen toppings.
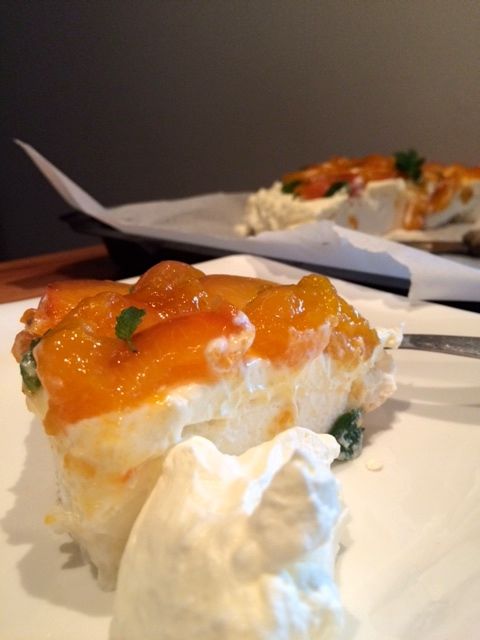 Now serve it up and eat it all! xx Hope you enjoyed.
